Screens can be configured to show Customer Orders when they are ready, which displays on a large monitor in view for the customers to know their meal is ready. It allows for multiple IKM’s to display orders from different stations on a single screen.
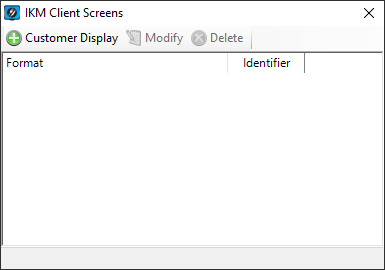
Go to Setup > Screens. This allows you to configure the Customer Display.
Press the ‘Customer Display’ button to configure. From this screen you can Add new Screens, or Modify/Delete existing. ‘Display Configuration’ will allow you to configure the options. You can select the check-box to Include Station Name on the display below the central order number being displayed.
Press Add and enter the details of the IKM Server that will send orders to the Customer Display.
You will need the following information:
Station - This is the description you have for the IKM that will serve the orders to the screen.
Address - Enter the IP Address or Computer Name of the IKM Server.
Port - By default the port is 5510, but can be changed to meet network requirements.
Identifier - This is a 4 character code that is displayed on the IKM Server only. To get this code on the IKM Server, you will need to go to Setup > Options > Display. Mark the option “Customer Displays Always Connect” as ‘True’. When you exit the settings, the code for the Server will be displayed at the bottom of the window in brackets.
Press OK to save all details.
After a screen has been added the icon will display.
This section is used to setup how the orders that are flagged as ‘Ready’ will be displayed.
Display – Select which monitor will be used to display for the customer. Use the Identify button to select the correct monitor.
Style – Select from Single Order or Scrolling Orders to change additional settings. More information on these settings is located within this chapter.
Background
Select the colours that will be used as the background for the monitor. If you would like a gradient effect, select two different colours, where the first field is the top and the second field is the bottom. If you would like a single colour, choose the same colour for both fields.
The Custom Colours will display the default colours used by IKM.
Font
Select the Font that will be used to display the words/numbers as they are ready.
Fill & Stroke
These fields are used to change the colour of the text. Fill is the wording itself and Stroke is the outline.
Display Time
Use the slider bar to select a time frame the order will stay on screen for. The setting allows for five seconds to fifteen seconds. If there is only one order that is ready the screen will not change.
This field is only available when the Single Order button is selected on the left-side of the COD Settings. If you want to use this function you must save your settings with this option selected.
Heading
Select this checkbox if you want to display the sale type that is attributed to the sale.
Transition
Select this checkbox if you want the numbers to change with effects. Effects that are available are Fade In/Out, Slide with Fade, Grow with Fade, Spin with Fade and Flip with Fade.
This field is only available when the Single Order button is selected on the left-side of the COD Settings. If you want to use this function you must save your settings with this option selected.
# of Orders
Select how many orders you want to display at the top of the screen in total that will scroll along.
Font Fill
Select the colour of the font for scrolling orders.
Border
Select the checkbox to confirm the use of a border, and the colour palette to select which colour the border will be.
Fill
Select the checkbox to confirm the use of fill, and the colour palette that will be used as the fill for the order number area.
Fill Opacity
Select the opacity of the scrolling order area.
Logo Image
The logo will be displayed at the bottom right corner of the COD. If you would like to create custom logos to display, they must adhere to strict guidelines or they may not display correctly, or at all. Create a folder on the COD terminal (preferably within the Ideal Kitchen Monitor folder) called “Display Logo”. Browse for the folder containing the logos that you want to display on the COD.
It is recommended to create three separate logo files, as IKM will only display the logo that is the correct resolution for the monitor that is being used.
File Name/Pixels/Example
Customerdisplay-s.png 90 x 30 
Customerdisplay-m.png 150 x 50 
Customerdisplay-l.png 300 x 100 
Each image must be 96dpi, 32-bit and can support alpha-transparency. If you would like no logos to display at all, Idealpos supplies a transparent logo that can be used.
By default the blank logos will be installed in the following locations.
Windows 32-bit systems:
C:\Program Files\Idealpos Solutions\Ideal Kitchen Monitor\BlankLogo
Windows 64-bit systems:
C:\Program Files (x86)\Idealpos Solutions\Ideal Kitchen Monitor\BlankLogo